71 Cutlass Supreme Seat Restoration
 January 22nd, 2010, 06:56 PM
#41
Registered User
Join Date: May 2008
Location: Dallas
Posts: 651
That is a super job!!! The front is the hard one, the back will be a cake walk.
Do you have the plastic peaces that cover the arm rest mounting brackets? I had to make one for my seat. Keep posting, tips and ticks.
Do you have the plastic peaces that cover the arm rest mounting brackets? I had to make one for my seat. Keep posting, tips and ticks.
 January 22nd, 2010, 07:08 PM
#42
Thanks! I do have the plastic pieces that cover the arm rest. The rear seat still looked good but obviously compared to the front seat, it is not as soft and shiny, but then again, I am picky.
January 22nd, 2010, 07:16 PM
#43
Since I had the seats out, I took the opportunity to clean up the floor. Some minor surface rust spots, otherwise the floor was mint:
IMG_0987.jpg?t=1264216179
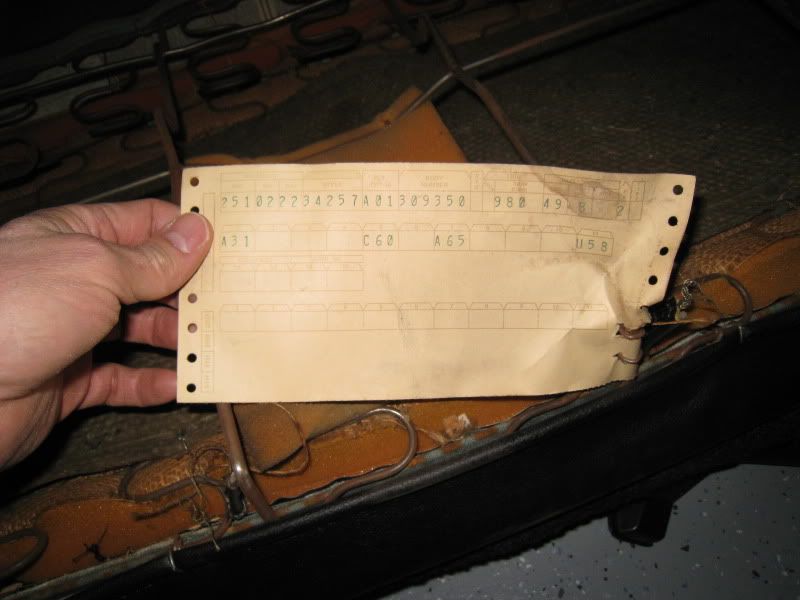
I did not find the build sheet, but I did find this:
IMG_0989.jpg?t=1264216414
It was attached under the back seat.
IMG_0987.jpg?t=1264216179
I did not find the build sheet, but I did find this:
IMG_0989.jpg?t=1264216414
It was attached under the back seat.
January 22nd, 2010, 07:37 PM
#44
Registered User
Join Date: Nov 2006
Location: McMurray, PA
Posts: 1,781
 January 22nd, 2010, 07:47 PM
#45
Thanks Terry, yeah I looked everywhere except under the headliner and did find anything. I'm trying to find out what dealership it came from through the last owner, hopefully I can at least find that out.
January 22nd, 2010, 08:20 PM
#46
Registered User
Join Date: Dec 2009
Location: Fair Play, SC
Posts: 231
Didn't find any paperwork at all.
January 22nd, 2010, 08:24 PM
#47
Bottom's back in along with the rear seat. The picture makes the carpeting look a little aged but it's still in nice shape. Even date coded Feb 5, 1971 by Fraser products on a tag behind the carpet. I took a picture of it but it did not come out very well.
IMG_0990.jpg?t=1264220426
IMG_0990.jpg?t=1264220426
 January 23rd, 2010, 05:08 PM
#50
Head Rests
The head rests in my Cutlass were adjustable as far as either all the way up or down, with no in-between. Here they are with the original locking location(for all the way up) from the factory:
IMG_0992.jpg?t=1264294427
This was way too high for me so I figured out what would be the right height, marked it on the headrest post, and cut another notch with my cutting wheel:
IMG_0993.jpg?t=1264294836
I also did the passenger side at the same location.
IMG_0992.jpg?t=1264294427
This was way too high for me so I figured out what would be the right height, marked it on the headrest post, and cut another notch with my cutting wheel:
IMG_0993.jpg?t=1264294836
I also did the passenger side at the same location.
January 28th, 2010, 06:27 PM
#52
Here's the front seat back in the car:
IMG_0994.jpg?t=1264731681
IMG_0995.jpg?t=1264731809
IMG_0996.jpg?t=1264731867
Now I just need to get some nice "Oldsmobile" floor mats to finish it off.
IMG_0994.jpg?t=1264731681
IMG_0995.jpg?t=1264731809
IMG_0996.jpg?t=1264731867
Now I just need to get some nice "Oldsmobile" floor mats to finish it off.
January 28th, 2010, 06:37 PM
#53
Registered User
Join Date: Feb 2008
Location: Plano, TX
Posts: 11,798
Looks swell - pat yourself on the back! You saved a good chunk o' cash, too.
I like the headrest mod - i need to do that also.
Fusick has some nice factory looking rubber mats in black. If they made them in Saddle, I would get some for my car.
I like the headrest mod - i need to do that also.
Fusick has some nice factory looking rubber mats in black. If they made them in Saddle, I would get some for my car.
 . Lesson learned
 .
.
 January 29th, 2010, 12:06 PM
#57
Registered User
Join Date: Feb 2008
Location: Plano, TX
Posts: 11,798
I circled the cuts in the picture below before I installed my bench seat last year.
I put my carpet in first, but still cut it like the factory did and made sure the carpet laid on top of the seat leg bolts when done.
January 31st, 2010, 04:11 PM
#58
Registered User
Join Date: Dec 2009
Location: Fair Play, SC
Posts: 231
When new, the seats were put in first and then the carpet went in by cutting a 'T' at each seat leg.
I circled the cuts in the picture below before I installed my bench seat last year.
I put my carpet in first, but still cut it like the factory did and made sure the carpet laid on top of the seat leg bolts when done.
I circled the cuts in the picture below before I installed my bench seat last year.
I put my carpet in first, but still cut it like the factory did and made sure the carpet laid on top of the seat leg bolts when done.
Perfect, Thanks Rob
May 15th, 2010, 01:24 PM
#59
Registered User

Join Date: Jun 2009
Location: southeastern Michigan
Posts: 14,229
Good thread. I wanted to clean the seatbelts in my '73 Custom Cruiser, which are also black, so I did a search and found this thread. I just cleaned mine of their 37 years of accumulated dirt and grim. Thank you.
January 16th, 2012, 10:25 AM
#61
Registered User
Join Date: Jul 2010
Location: Montreal, QC
Posts: 2,175
Hey Darrell,
Your seat looks great!
I see you have some pictures of the seat belt installation. Did you have to cut holes in the fabric or the holes were already there to thread the seatbelts through??
Any pictures of seat belt placement or the process would be great!
thanks,
Tony
Your seat looks great!
I see you have some pictures of the seat belt installation. Did you have to cut holes in the fabric or the holes were already there to thread the seatbelts through??
Any pictures of seat belt placement or the process would be great!
thanks,
Tony
January 16th, 2012, 07:23 PM
#62
Tony,
I will go back and see if I have any pictures of the seat belt placement. What I do remember was that I had to cut holes for the seat belt guides in the front seat. After the seat material was fully installed, I used the holes in the seat frame as my template for cutting. Basically I made an "x" with a x-acto knife and then inserted the seatbelt guide plastic sleeve in place.
I will go back and see if I have any pictures of the seat belt placement. What I do remember was that I had to cut holes for the seat belt guides in the front seat. After the seat material was fully installed, I used the holes in the seat frame as my template for cutting. Basically I made an "x" with a x-acto knife and then inserted the seatbelt guide plastic sleeve in place.
January 16th, 2012, 07:33 PM
#63
Registered User
Join Date: Jul 2010
Location: Montreal, QC
Posts: 2,175
Tony,
I will go back and see if I have any pictures of the seat belt placement. What I do remember was that I had to cut holes for the seat belt guides in the front seat. After the seat material was fully installed, I used the holes in the seat frame as my template for cutting. Basically I made an "x" with a x-acto knife and then inserted the seatbelt guide plastic sleeve in place.
I will go back and see if I have any pictures of the seat belt placement. What I do remember was that I had to cut holes for the seat belt guides in the front seat. After the seat material was fully installed, I used the holes in the seat frame as my template for cutting. Basically I made an "x" with a x-acto knife and then inserted the seatbelt guide plastic sleeve in place.
Great! Thanks for checking! If you do come across a picture just post it here since i'm subscribed to your thread.
I'm a little bit nervous about cutting up my vinyl to insert the plastic piece...
-Tony
January 28th, 2012, 05:59 PM
#64
Registered User
Join Date: Dec 2005
Posts: 511
Did you install new upholstery on the back seat bottom? I'm having a problem figuring out how the cover attaches to the back side of the frame. My hog ring pliers don't seem to be big enough for the oval holes that are supposed to be used for attaching. These are the only holes there, and after an hour and a half of trying to figure it out I had to take a sanity break. Do you have any pictures of this step? Thanks, Chumley
January 29th, 2012, 07:09 PM
#65
Chumley,
Sorry to hear that you are having trouble with that part. I have not done the back seat yet, although I plan on it. It is in great shape, but it is no where near as soft as the front seat. Do you have any pictures of the problem area?
Sorry to hear that you are having trouble with that part. I have not done the back seat yet, although I plan on it. It is in great shape, but it is no where near as soft as the front seat. Do you have any pictures of the problem area?
January 30th, 2012, 03:39 PM
#66
Registered User
Join Date: Dec 2009
Location: Fair Play, SC
Posts: 231
Here's a couple of "befores" I dug up from when covered the seats in my '72. Hope these help.
Rear2Large.jpg
Rear1Large.jpg
Rear2Large.jpg
Rear1Large.jpg

Thread
Thread Starter
Forum
Replies
Last Post
Del70
Small Blocks
15
July 21st, 2020 11:42 AM


