When you click on links to various merchants on this site and make a purchase, this can result in this site earning a commission. Affiliate programs and affiliations include, but are not limited to, the eBay Partner Network.
Reading Oldsmaniac thread about his wagon has inspired me to write.
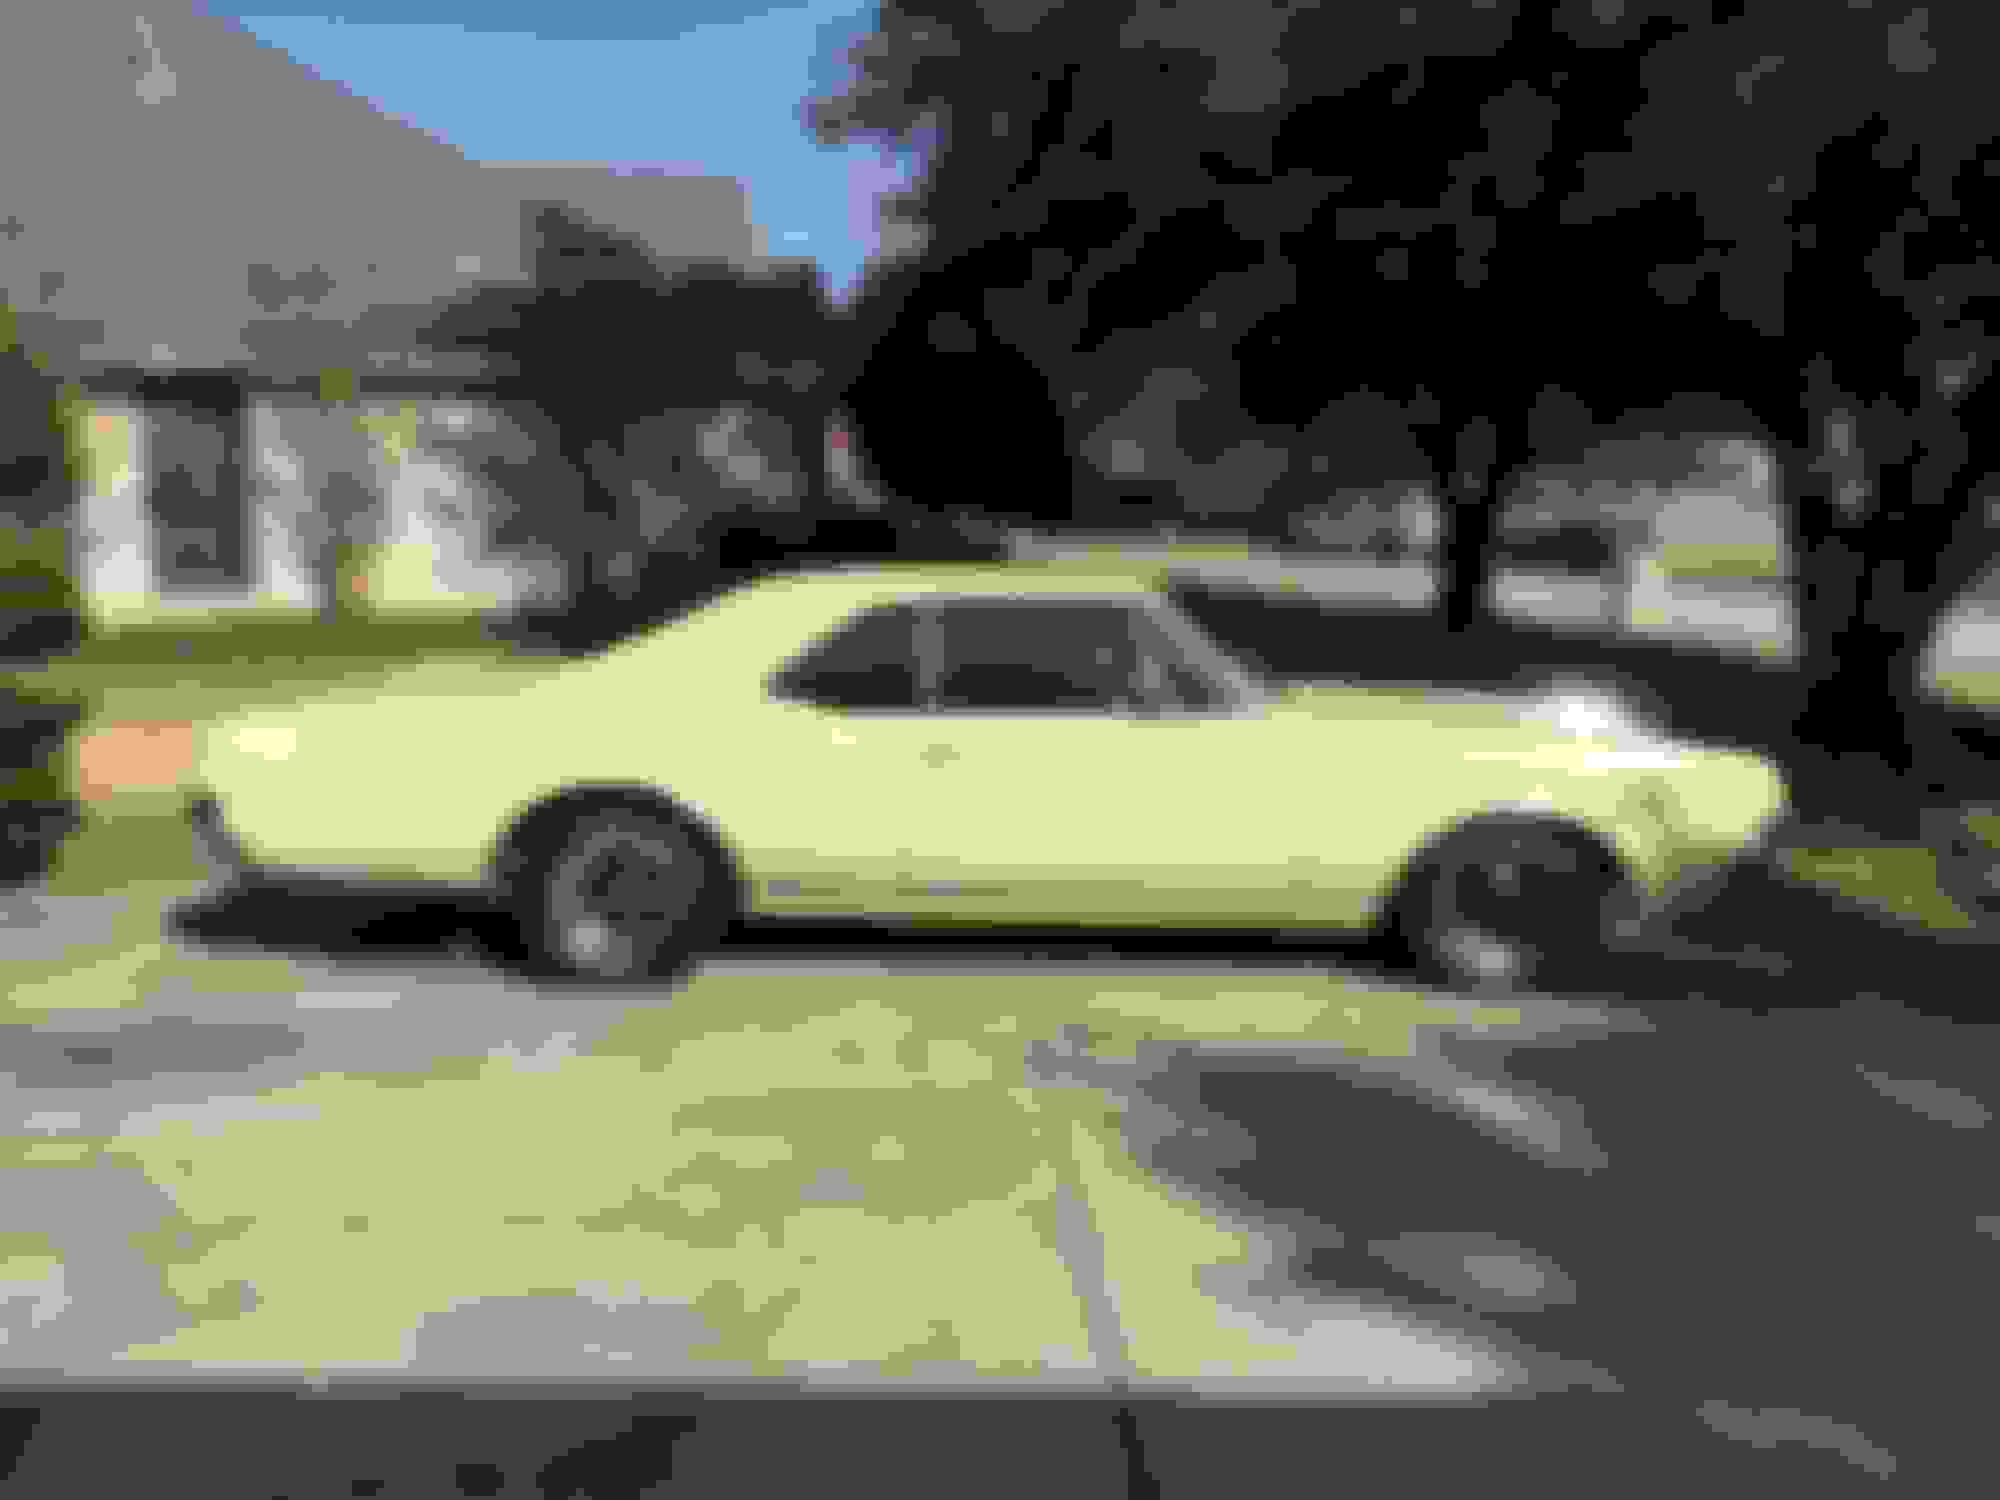
I found the above mentioned car in a semi enclosed barn in July of 2017 (I seem to have a habit of buying 50 year old cars). She wouldn’t start when I first saw her, but the motor turned over. My second trip found a bad fuel pump and the local O’Rileys happens to have a suitable one in stock so I was able to get her started (after draining the tank). I purchased her on the spot and drove her 80 miles to my home. Here are my pics after a descent cleaning.
She had been restored and painted about 10 years earlier but then stored for the las 5. I could not talk to the restorer or the person that commissioned the work so I really didn’t know what was done, right or wrong.
I decided this would eventually become my daily driver, so the rebuild began. I live in a neighborhood, so I can’t do this work in my driveway. Fortunately, the wife lets me take over the garage when I need to do something major.
She is a numbers matching CS Holiday Coupe with a high compression 330 and a 2 speed Jetaway trans. The original color was gold but the current 2 stage yellow is pretty close to a factory color at the time. The clear coat is peeling at the back as that part of the car was open to the elements. The interior is not nearly as good as that picture makes it seem.
I decided this was going to be a mild restomod and started making plans for upgrades.
I had a lot of fuel issues, so I started with a new tank, new sending unit, and new fuel lines (I had already replaced the fuel pump). I tried to rebuild the original carb multiple times with 4 or 5 different special order rebuild kits and finally gave up and mounted a new Edlebrok 4BBL. After that she was pretty reliable, but I was constantly fighting lighting issues inside and out.
The next task was retiring. I ripped out all the wiring and replaced it with an appropriate kit from painless. In my humble opinion, it was not painless but I suspect it may have been better than most kits. One issue was documentation (it was clearly meant for a Chevelle) and I found lots of places where things didn’t seem to work out as stated. Thanks to the guys here, I got the Switch Pitch converter wired up and working properly. I also got a lot of help from here to retire the dash properly. Unfortunately, I still don’t have the light inside my center console working.
While I had the dash out, I decided to repair and repaint it. I could not have gotten the dash out without this forum. I had to use a lot of JB Weld on some very brittle plastic to get things back together. I also used this time to add a Walnut steering wheel a multi gauge, and a new radio.
Unfortunately , while working on the switch pitch wiring, I managed to pull the connection right out of the trans and made a huge mess in my garage. Trying to rebuild the internal trans wires was not pleasant and getting the kick down solenoid back in place was a real hassle. Unfortunately, I still have a small trans leak.
The next task was disc brakes for the front. I quickly realized at the beginning of this work that the entire front suspension needed to be rebuilt. My A-Arms were shot, the ball joints were shot, there were little to no bushings on the sway bar and the steering linkage had a lot of wiggle. Here is what I have done with brakes.....
You can see some of the wiring work in his pic as well.
I had to manufacture sway bar end links as my new A-Arms didn’t have the same mount points. Here is what I built out of parts in my garage (no trip to the parts store for this task).
The biggest issue here was getting the original, now powder coated, coil springs back in place. If I had a lift, this would have been easier. It was very difficult to get the clearance needed with jack stands.
So now Buttercup really is a daily driver. Reliable fuel, reliable lighting, tight suspension, and great brakes. However, I live in Texas so the next task is AC.
She had all the original AC parts when I first picked her up but the blower was shot and the heater core was shot. I’m planning pg to use a HotRod HVAC unit from Classic Air mainly because they are located between my house and my work. I hope todo this over the Christmas holidays but I’m sure the wife, daughters, and grand kids have different ideas for my time.
It will be a long time before I can rebuild the interior and repaint this car. I originally intended to repaint her a dark burgundy, leave most of the black interior but make the seats and door panels parchment. However, the yellow seems to be growing on me and I think my interior plan will work well yellow or burgundy. This is a BC/CC paint job and the clear coat is peeling off the trunk like crazy. This is made worse because she stays outside in the driveway (no room for her in the garage).
She had a vinyl top but that was removed before I got the car. Unfortunately, they did nothing to smooth out the top/pillar welds before painting. The back drivers quarter panel was hit at some point and there is some bonds there. The drivers front quarter panel sticks out a bit far right in the middle where the body line is. I’ve tried to get that back in alignment with the door but no luck so far.
The bumpers, while functional, are in bad need of a rechrome and ms CS has a non CS back bumper so I don’t have the holes for the reverse lights.
Ive never done body work or paint but I think I might try and I’m thinking lacquer instead of BC/CC. I might be able to spray lacquer here in Texas outside on a calm day.
Hey gang, I have a question. Now that my 1967 CS is out of the garage on on the streets, I've noticed that the entire car tilts towards the front drivers side. I have not taken measurements yet, but I will this weekend. I suspect that I need to replace my springs, both front and rear. I'm looking for a little lower than stock (which I may have already achieved on the driver front corner) but not drastically lower. So, my questions are:
1) Does any one know what the ride height should be for a 1967 CS Holiday Coupe (all 4 corners if possible)?
2) Does any one know what the original spring rates were for the same?
Armed with the info above and the way my car currently sits;
DF = 8. PF = 9
DR = 8.5. PR = 9.5
My front driver spring is definitely shot and so is the rear spring on that side. So, I think I want 1 inch lowering springs on the front and stock height springs on the back. It should look like this......
I know it is a matter of personal preference but I would like to hear your opinions.
I have recently acquired a TH350. It needs to be rebuilt but I am looking forward to that learning process. However, I am wondering what else would need to be changed to use this trans in place of my factory JetAway. I would like to retain the Switch Pitch Torque Converter if I can. I've seen on this forum that this is a direct replacement trans for a 68 but I did not find anything about 67.
Hope I can jump in with a question, the TH350 trans should bolt in (Correct?) The question is can you use the old 2 speed torque converter?
Just trying to take some notes so I can put a 3 speed in my 330 olds. Thanks Brian
I would like to start dressing up my engine bay. Does a set of standard GM 350 valve covers fit our 330?
If as in standard Chevy small block vc's? No, but you can use any Olds vc's for a 330,350,400,425,455
Also, does anyone have a source for replacement brake lenses?
Are you wanting the lens or the chrome bezel? OPGI, Yearone, and some of the other repro places sell the bezel. You can polish and reuse the old lenses once you take the assy apart.
My current bezels are OK, not stellar, but OK. My lenses are very dull. I have taken the assembly apart, washed everything and repainted the insides of the bezels a bright silver. I have tried to polish the lenses with polishing compound but did not gain much. I may try again with rubbing compound and then polishing compound.
You might try to find NOS lenses on Ebay or Amazon. My son found some new GM in the box on Ebay five years ago. Had to pay premimum price but try to find some now.
I finally got to start in the AC. I purchased a Vintage Air Gen IV Magnum. It took an amazing amount of work to get the old condenser out, all the rubber vibration isolators were shot and all the bolts were rusted. I have my new condenser and drier mounted using original mounting hardware with new vibration isolators.
I got the compressor mounted. I’m using a Sanden compressor from Vintage Air and one of their brackets.
The compressor bracket is from Vintage Air as well but their website says it doesn’t fit a 67 330. However, the install instructions say it fits and it does. It is a little tight against my fuel pump but I can fix that with a different hose fitting.
This bracket was ordered from Vintage Air as part number 141008. It uses the existing holes as mounting points and with the compressor mounted, I believe the belt will mate up nicely with the crank and water pump.
I got the inside unit mounted. It is only a test fit, now I need to take it all apart so I can Drill the holes for the pass through and seal up the firewall once and for all. I will try to get all the lines measured and cut today so I can get the end fittings crimped some evening this next week.
The next task was disc brakes for the front. I quickly realized at the beginning of this work that the entire front suspension needed to be rebuilt. My A-Arms were shot, the ball joints were shot, there were little to no bushings on the sway bar and the steering linkage had a lot of wiggle. Here is what I have done with brakes.....
You can see some of the wiring work in his pic as well.
may I ask, which brand/kit did you go for the discs sir?
I did not use a particular brand. I did a search on eBay for a front disk system that would fit my car and then found the one that came with all the right stuff and slotted and drilled rotors. I purchased the lines from OPGI, I think.
I finally did some cleanup of the firewall and fender on the passenger side. I even got the new air cleaner and valve cover installed. I still need to make custom spark plug wires so that the cable management works better.
I went to a place called Twisted Chrome (www.twistedchrome.com) and ordered them. They have lots of different designs and lots of color combinations. They apply like a sticker but have no edges. You pull one side of the sticker back and stick the design to your item and press it on really well, then you peel the other side off and the pin stripe remains.
While waiting for my aluminum 3 row radiator and electric fans, I started taking the interior apart. I started with the back seat and ran into an issue. When I rewired the car, I didn’t use that flat wiring harness, so I made my own run to the trunk from the fuse panel. In the process, I managed to thread the wires through part of the back seat frame ..... doh!!!!! Now I have to take that wiring all apart, pull it back, and retread it (this time avoiding the seat frame. Part of the reason I rewired the car was due to rear light issues, it has been rock solid since the rewired, I hope I don’t introduce any gremlins.
Well, I got the wiring that went through the seat frame all pulled out and reinstalled. It was not as bad as I was expecting and I did a little better job with the fuel sending wire in the process.
I rewelded the passenger seat track bolt tonight. I got the rear package shelf cut to fit and installed and reinstalled the deck speakers. I got the OPGI carpet out of the box and layer it all out flat in hopes it will flatten out over the next few days. I’ve got a lot of measuring and cutting to do on the carpet to get it all fit properly. I would love to hear any helpful tips on carpet install.
 November 23rd, 2019, 09:23 AM