72 Olds Cutlass
 February 21st, 2010, 08:05 PM
#81
Just an Olds Guy
Join Date: Jul 2008
Location: Edmonton, AB. And "I am Can 'eh' jun - eh"
Posts: 24,525
So, Richey
Are you the supervisor wearing blue sweat and baseball cap? Good job. Theres enough sealant on that glass to make sure water isn't an issue anymore. BTW, when I wash my car, I usually use my air compressor and blow out the areas where the trim is to make sure nothing stays in there to start rusting. Once it starts, its really a PITA especially when everything else on the car is dang near perfect.
Are you the supervisor wearing blue sweat and baseball cap? Good job. Theres enough sealant on that glass to make sure water isn't an issue anymore. BTW, when I wash my car, I usually use my air compressor and blow out the areas where the trim is to make sure nothing stays in there to start rusting. Once it starts, its really a PITA especially when everything else on the car is dang near perfect.
 February 22nd, 2010, 07:33 AM
#82
Registered User
Thread Starter
Join Date: Oct 2009
Posts: 204
no leaks
Yea you spotted me working hard.  We had to use a little excessive sealant since we had rebuilt the bottom piece with fiberglass. it was not exactly smooth. Not only did we add a big bead of selant on the windshield we filled in the dips in te fiberglass... It did require a little clean up inside with paper towels and some solvent... Don't think we'll have a leak problem. Next I plan on using some of the urethane selant to solve my drip rail issues and smooth out the inside of them with that and hopefully eliminate any leakage there and prevent a rust problem... more to come next weekend...
We had to use a little excessive sealant since we had rebuilt the bottom piece with fiberglass. it was not exactly smooth. Not only did we add a big bead of selant on the windshield we filled in the dips in te fiberglass... It did require a little clean up inside with paper towels and some solvent... Don't think we'll have a leak problem. Next I plan on using some of the urethane selant to solve my drip rail issues and smooth out the inside of them with that and hopefully eliminate any leakage there and prevent a rust problem... more to come next weekend...
February 25th, 2010, 07:07 PM
#83
Just an Olds Guy
Join Date: Jul 2008
Location: Edmonton, AB. And "I am Can 'eh' jun - eh"
Posts: 24,525
Heck, supervisors aren't supposed to work that hard. I hope the fibreglass piece holds up ok too. With all that adhesive and the window in place, it should be super strong. I'm also guessing that you're not planning on driving this car in the rain a lot, or leaving it outside after all that work. You're a lucky man to have some good young friends that have skills they can help you with.
February 25th, 2010, 09:04 PM
#84
Registered User
Thread Starter
Join Date: Oct 2009
Posts: 204
I do think it will be road worthy and hold up in the rain... My storage is outside but I'll have a carcover and one of those vinyle garages. I think with both of those it will keep it pretty good. Hopefully this next year I build a carport on the end of my barn. But I have too many other projects to dedicate my barn to keeping the Cutlass inside.. and just don't see a seperate garage in my future.... But I still have a long way to go on the interior plus still need to do another round of wet snading and polishing,,, or does it really end?? totally agree on having talented friends to help!! I have learned a lot on the project!!
Last edited by richeyb; February 25th, 2010 at 09:06 PM.


 March 8th, 2010, 08:09 AM
#91
Registered User
Thread Starter
Join Date: Oct 2009
Posts: 204
windshield molding..
Thanks Cutlassgal, still a long way to go but a fresh set of seat covers will make a difference. Their in the barn ready to go, just not time yet to start onteh inside, still need to do some more wet sanding and polishing on the paint.... have a little dust issue in the paint that needs to be taken care of.... nothing a little elbow grease won't tke care of....
What I haven't talked about was the windshield and molding that was a real trick.... windshield went in fine with a lttle extra sealant to take care of the fiberglass rebuild of the base... but when I went to put back the molding there was about a 3/8 inch gap between it and the windshield...not sure what happened there. may be missing a spacer or something? anyway it was safely on, so looked at options, of bending the modling to match windshield, or adding selant(urethan under modling to hold in place. Elected to do second option. placed masking tape on windshield, got the caulking gun and shot it full of urethan, smoothed it out, pulled off tape and it looks like it came from the factory that way..... hope to never chang the windshield or I be back doing a restore.....
What I haven't talked about was the windshield and molding that was a real trick.... windshield went in fine with a lttle extra sealant to take care of the fiberglass rebuild of the base... but when I went to put back the molding there was about a 3/8 inch gap between it and the windshield...not sure what happened there. may be missing a spacer or something? anyway it was safely on, so looked at options, of bending the modling to match windshield, or adding selant(urethan under modling to hold in place. Elected to do second option. placed masking tape on windshield, got the caulking gun and shot it full of urethan, smoothed it out, pulled off tape and it looks like it came from the factory that way..... hope to never chang the windshield or I be back doing a restore.....
April 3rd, 2010, 05:24 PM
#92
Registered User
Thread Starter
Join Date: Oct 2009
Posts: 204
Working this weekend to finish up the paint job�. Wet sanding and polishing the sides. I�ll be using 1500 and 2000 grit wet sandpaper working to remove some dust and orange peel..
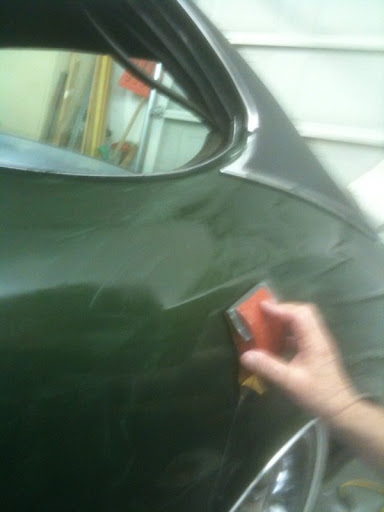
Wet sanding using soapy water, 1500 grit paper and a 3m sanding block. I also used a spry bottle of soapy water to keep area damp/wet.
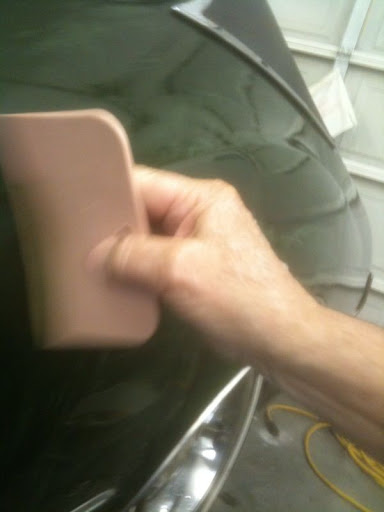
Using rubber scrapper to check to insure dull sheen with no shiny spots�
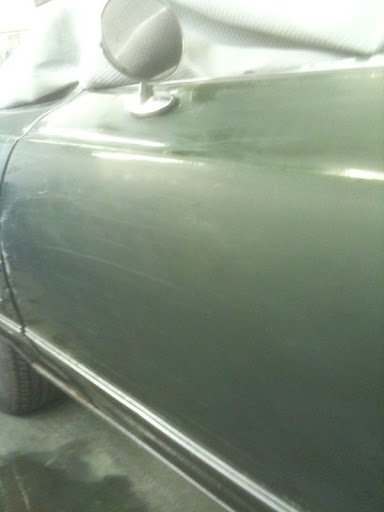
Finished 1500 grit sand and now soaking 2000 grit and watching Butler and Michigan fight it out�.
Hope to finish tomorrow!! And polish up with a XXX 1 step polish�Cheers and Happy Easter!!
Wet sanding using soapy water, 1500 grit paper and a 3m sanding block. I also used a spry bottle of soapy water to keep area damp/wet.
Using rubber scrapper to check to insure dull sheen with no shiny spots�
Finished 1500 grit sand and now soaking 2000 grit and watching Butler and Michigan fight it out�.
Hope to finish tomorrow!! And polish up with a XXX 1 step polish�Cheers and Happy Easter!!
 May 13th, 2010, 08:15 PM
#94
Registered User
Thread Starter
Join Date: Oct 2009
Posts: 204
Cheers
Richey
August 2nd, 2011, 08:12 PM
#96
Registered User
Thread Starter
Join Date: Oct 2009
Posts: 204
Restroing the engine bay area
After completing the interior restoration, I next tackled cleaning and working on restoring the engine bay area. The first step was to go to the car wash and with the help of several cans of engine cleaner and high powered cleaner I was able to do a good basic cleaning. The next step was to clean, sand, prime, and paint the interior frame holding the radiator. Since this is the first part you see it really cleaned up the engine area.

You can see I left one of the original decals on the frame since it is in fair shape and still can be read. I might change it out later. I did leave the air cleaner cover original. It cleaned up fairly well and still had a decal in fair condition.

There were still two parts missing that I needed to replace, the radiator fan shroud and the A-Frame seals between the front wheel and the engine compartment.
The Fan shroud was fairly easy to install. I removed the fan and sled the shroud from the right side behind the radiator. Since I had forgot to insert the clip bolt on the shroud I had to force it into a position I could install them. I then put the fan back on and bolted the shroud in place. Only problem was that the fan hit the bottom of the shroud when it rotated. Since it has not adjustment room I elected to just cut off the bottom to eliminate the rubbing area. You can see that in the photo below. I don�t know if that is a common problem or if my engine is sitting a little to low??

New shroud!

Cut out area
The A-Frame Seals were easier to install than I had imagined. The rubber seals are precut to an exact fit and comes with a set of replacement staples. I removed the wheel and found that the old staples were still there and only a couple broke off when I straighten them out. For the ones that broke I just drilled out and replaced with a new staple. I then took a large socket on my finger to brace the staple and pushed the rubber seal on to the staple with the help of a flat screw driver. I then fold the staples over and pinched them down flat with large mouth pliers. I did then squeeze in some 3M adhesive behind the seal to help hold it in place.
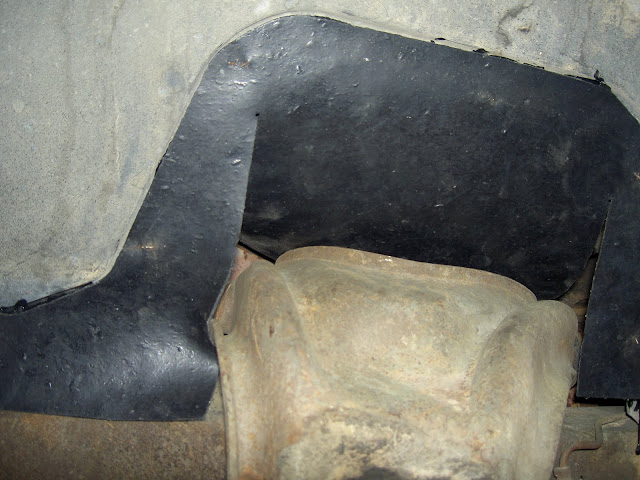
A-Frame Seal once in place�
One more step completed in a never ending effort!!
You can see I left one of the original decals on the frame since it is in fair shape and still can be read. I might change it out later. I did leave the air cleaner cover original. It cleaned up fairly well and still had a decal in fair condition.
There were still two parts missing that I needed to replace, the radiator fan shroud and the A-Frame seals between the front wheel and the engine compartment.
The Fan shroud was fairly easy to install. I removed the fan and sled the shroud from the right side behind the radiator. Since I had forgot to insert the clip bolt on the shroud I had to force it into a position I could install them. I then put the fan back on and bolted the shroud in place. Only problem was that the fan hit the bottom of the shroud when it rotated. Since it has not adjustment room I elected to just cut off the bottom to eliminate the rubbing area. You can see that in the photo below. I don�t know if that is a common problem or if my engine is sitting a little to low??
New shroud!
Cut out area
The A-Frame Seals were easier to install than I had imagined. The rubber seals are precut to an exact fit and comes with a set of replacement staples. I removed the wheel and found that the old staples were still there and only a couple broke off when I straighten them out. For the ones that broke I just drilled out and replaced with a new staple. I then took a large socket on my finger to brace the staple and pushed the rubber seal on to the staple with the help of a flat screw driver. I then fold the staples over and pinched them down flat with large mouth pliers. I did then squeeze in some 3M adhesive behind the seal to help hold it in place.
A-Frame Seal once in place�
One more step completed in a never ending effort!!
October 16th, 2011, 12:41 PM
#97
Registered User
Thread Starter
Join Date: Oct 2009
Posts: 204
Final Interior piece
I finally have finished my interior make over. After searching the internet and a couple of junk yards, I found the connectors for my dome light, spliced it in and installed my new dome light. (My original dome light had fallen apart when I took it off to install my new headliner.. and found when you order replacement dome fixtures they do not come with the electrical connections.....

Mission complete!!
Mission complete!!
October 17th, 2011, 06:22 PM
#101
Registered User
Join Date: Aug 2011
Location: Maryland
Posts: 211
Nice work on restoring that cutlass. I have had that same problem you have with the fan hitting the bottom of the fan shroud. Seems strange that there would be that much room at the top of the fan shroud but so close at the bottom.
October 17th, 2011, 07:28 PM
#102
Registered User
Thread Starter
Join Date: Oct 2009
Posts: 204
maybe one of the forums tech experts know or has some thoughts?/
 November 30th, 2011, 06:14 PM
#104
Just an Olds Guy
Join Date: Jul 2008
Location: Edmonton, AB. And "I am Can 'eh' jun - eh"
Posts: 24,525
Think I found your 'problem'
If you have the 72 Assembly Manual, look on [manual section 11] page 112 (fan shroud to tie bar and upper support). It clearly shows that the fan shroud has shims placed as needed (.180") or as required between the top of the shroud and upper rad support. This allows the shroud to be lowered and fastened a sufficient distance to clear the bottom of the shroud. I know there's no instruction manuals that come with these aftermarket pieces. The AM is a valuable resource that would have saved you cutting the bottom out of a new shroud.


