72 Olds Cutlass
 November 6th, 2009, 08:22 PM
#1
Registered User
Thread Starter
Join Date: Oct 2009
Posts: 204
72 Olds Cutlass
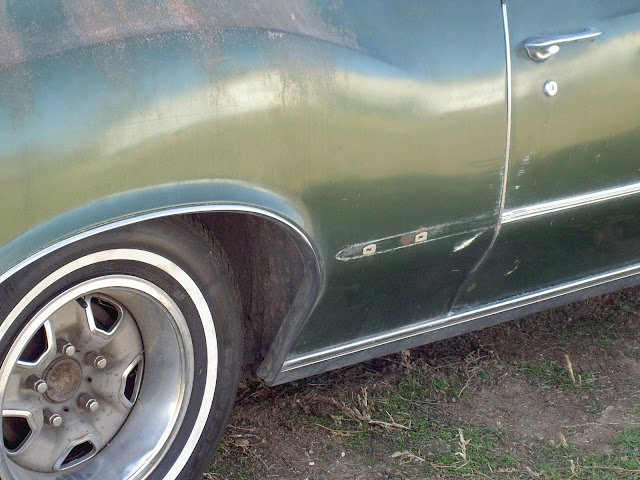
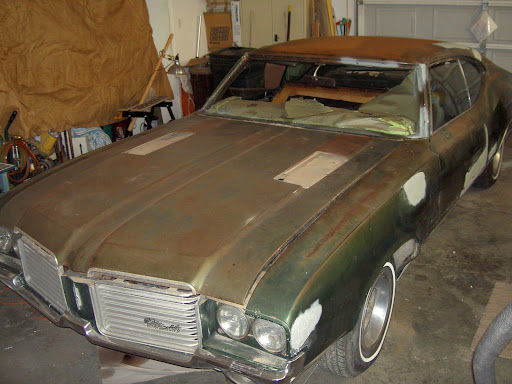
 This is a copy of my first post on this site.... trying to figure out how to post and start threads... I'm in the process of restoring the old family car I bought new in 1972 and then taught 2 kids to drive in and sent off to college finally in the 80s. I thas been through a lot and is now getting restored... 2 door, hardtop, engine V-8 350, rebuilt with good trans and suspension.... so now it has finally come home to get some body work, only 3 panels with a couple rust spots and small dent in one door .... I have new weatherstripping and just got a set of side molding clips to put the molding back on once we remove it to do some body work and paint..
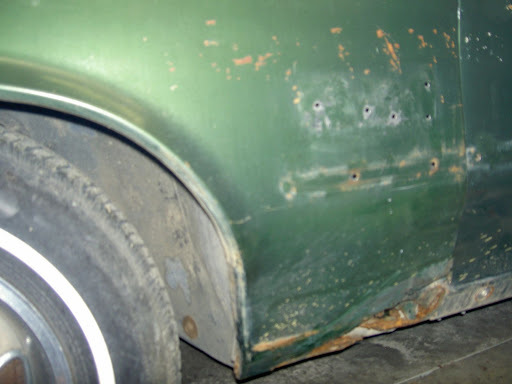
 Only missing one small piece of molding. The small piece of molding on the right rear fender, between the wheel well and the door. looked on ebay and other sites but can't find.. so I have joined this site hoping to find mine missing piece... can anyone help??
 November 6th, 2009, 09:00 PM
#2
Cutlass Lover
Join Date: Jul 2009
Location: Twinsburg, Ohio
Posts: 6,587
I like you already!! Nothing like a good old 72!!! Welcome to the site!! Have you tried Fusicks? I don't have my catalog in front of me, but I know they sell some different moldings. Post some pics when you can... we love pics!!
November 6th, 2009, 09:36 PM
#3
Registered User
Join Date: Nov 2007
Location: Rathdrum, Idano
Posts: 9,127
Sounds like you have a real family car thats been through a lot. Shows how good of a car the Olds is. I'll copy this post to the Cutlass forum, hopefully some one there can help you out
November 7th, 2009, 08:52 AM
#4
Registered User
Thread Starter
Join Date: Oct 2009
Posts: 204
Thanks for the welcome Cutlassgal and citcapp. Yes the Cutlass has been through the mill and could probably tell some stories I would not want to hear, but it jsut keeps on going!!..... I will post some pics later today... a little bit more rust than Cutlassgal's but it won't be long.... I was ask on another form if it is a surpeme or S and it is the Cutlass S. Have not looked at Fusicks. Can I just google and find it? Thasnk for the help..
Richey
Richey

 November 7th, 2009, 11:33 AM
#9
Moderator
Join Date: Jun 2008
Location: Atlanta, Georgia
Posts: 17,623
Bummer
Ya might as well start looking for some bolt on ceneter caps for those SS II wheels while ya search fer the chrome piece.
") November 7th, 2009, 11:43 AM
November 7th, 2009, 11:43 AM
#10
Just an Olds Guy
Join Date: Jul 2008
Location: Edmonton, AB. And "I am Can 'eh' jun - eh"
Posts: 24,525
Hey Richey! Welcome to CO.
You've definitely got some work ahead of you, and the results are 150% worthwhile....you're also right about one thing. It's almost like having an energizer bunny. These beasts just keep going and going and going...LOL What kind of options does your car have? Is it a 350 or 455 engine? You'll want to look carefully at any rust around the vinyl roof moldings, it can be deadly. Judging from the fenders, you should be able to do patch panels. The quarters look like they're in pretty good shape. My car is also a 72 Cutlass S. I ditched the body side moldings because it interfered with the side decaling I put on. I wouldn't trade it for the world. It's a great car to drive and show off.
2008_0314MILLER0036.jpg?t=1257622810
2008_0314MILLER0007-Copy.jpg?t=1257622874
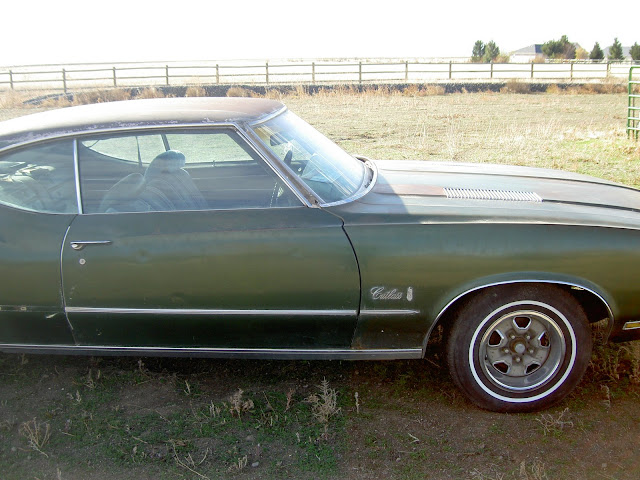
Yes, you have a Cutlass S if all the body emblems on your car are original. The styliized S just behind the Cutlass emblem is an indicator. Also look at your VIN and post it. We can give you more information about what your car is from that. If it was a Cutlass Supreme it would look like this:
71CS.jpg?t=1257622417
You can see the different body styling on the roof line and quarter panels.
You've definitely got some work ahead of you, and the results are 150% worthwhile....you're also right about one thing. It's almost like having an energizer bunny. These beasts just keep going and going and going...LOL What kind of options does your car have? Is it a 350 or 455 engine? You'll want to look carefully at any rust around the vinyl roof moldings, it can be deadly. Judging from the fenders, you should be able to do patch panels. The quarters look like they're in pretty good shape. My car is also a 72 Cutlass S. I ditched the body side moldings because it interfered with the side decaling I put on. I wouldn't trade it for the world. It's a great car to drive and show off.
2008_0314MILLER0036.jpg?t=1257622810
2008_0314MILLER0007-Copy.jpg?t=1257622874
Yes, you have a Cutlass S if all the body emblems on your car are original. The styliized S just behind the Cutlass emblem is an indicator. Also look at your VIN and post it. We can give you more information about what your car is from that. If it was a Cutlass Supreme it would look like this:
71CS.jpg?t=1257622417
You can see the different body styling on the roof line and quarter panels.
November 7th, 2009, 12:09 PM
#11
Registered User
Thread Starter
Join Date: Oct 2009
Posts: 204
Jamesbo The bolt on center caps are on my want list. I have one in the trunk, but do need 3... The decallng looks great but I was wanting to go back to original... It is the basic 350 with auto trans.. My plan is to stay with same color green and go with a vinyl top, orignal but maybe change the color to a shade of green or brown instead of white..? Good tip on checking edge of vinyl and windows. It is definitley going to take a little work along edges. Especially along windshield frame. One of my firends a excellent bodyman, felt pretty confident it wouldn't be that bad to fix... time and $s will tell..
 November 7th, 2009, 12:50 PM
#13
Registered User
Join Date: Nov 2007
Location: Rathdrum, Idano
Posts: 9,127
Here's the link to Fusick http://www.fusick.com/. Great company to do business with. Having a friend thats a bodyman is a plus and that he is willing to help you out is a great bonus
November 7th, 2009, 06:32 PM
#15
Past Administrator
Join Date: May 2004
Location: Rural Waxahachie Texas
Posts: 10,014
Richie, if I missed it in another thread, welcome to CO. That car will look so nice by the time you finish it. I owned a '72 Cutlass many years ago that started out about that same condition and got it looking presentable, not show worthy but a real nice looker. Good luck.
 November 9th, 2009, 06:05 PM
#19
Registered User
Thread Starter
Join Date: Oct 2009
Posts: 204
My plan right now is to take care of the rust, pull out old putty job, reputty, fill in couple dents, etc and do a good undercoat, and then finsh off with a vinyl... Agree long term vinyl tops leads to rust, espeically in a damp climate, lucky to live in a high desert... just trying to get back to the start.....
 November 10th, 2009, 07:33 AM
#21
Registered User
Thread Starter
Join Date: Oct 2009
Posts: 204
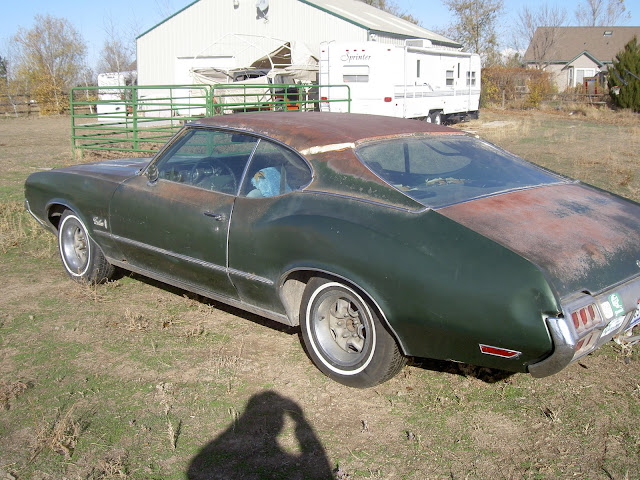
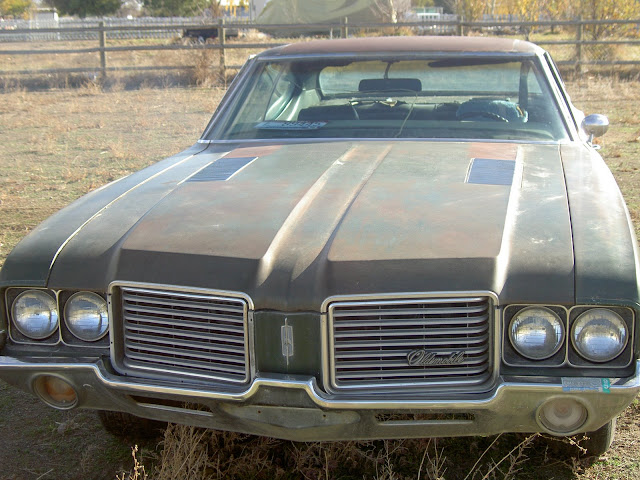
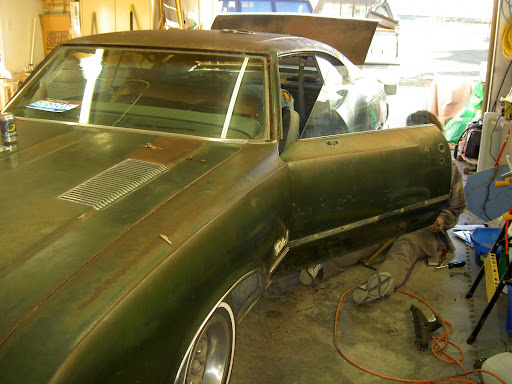
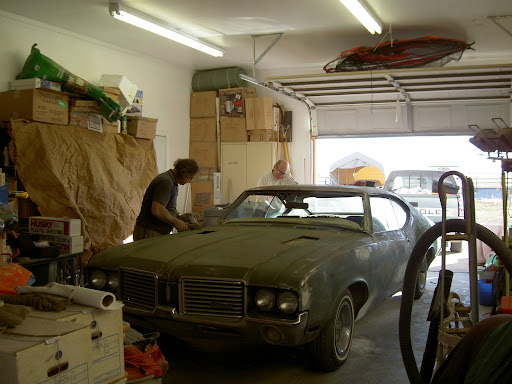
Pictures showing Pre restoration
http://picasaweb.google.com/gunfight...IGMrqP585CAKA# here is a web page with a few more pictures of my project!!
November 10th, 2009, 10:23 AM
#22
Cutlass Lover
Join Date: Jul 2009
Location: Twinsburg, Ohio
Posts: 6,587
Aahhh... bless her heart!! She's going to require some time and patience, huh? I see true beauty within, though!! My first 72 was kind of a forest green color with the same green brocade interior as The Prettiest one has!
My first 72 was kind of a forest green color with the same green brocade interior as The Prettiest one has!
November 26th, 2009, 07:53 PM
#23
Just an Olds Guy
Join Date: Jul 2008
Location: Edmonton, AB. And "I am Can 'eh' jun - eh"
Posts: 24,525
Ritchie,
Don't know if you got your molding. Take a look at this auction on ebay. For the price he's asking, this is a steal. http://cgi.ebay.ca/ws/eBayISAPI.dll?...E:B:SS:CA:1123
Don't know if you got your molding. Take a look at this auction on ebay. For the price he's asking, this is a steal. http://cgi.ebay.ca/ws/eBayISAPI.dll?...E:B:SS:CA:1123
November 27th, 2009, 06:26 AM
#24
Registered User
Join Date: Oct 2009
Location: Dallas, TX
Posts: 26
Hi there richeb,
I just joined the site recently as well. Great bunch of people here who are willing to help.
I have a 70 Cutlass S myself. It seems that this rust around the window moldings is very common. I got some of the same on mine.
I found some center wheel caps, which don't fit my car. Don't know if they will work for you, but they are availabe.
Tony
November 27th, 2009, 08:25 AM
#25
Registered User
Thread Starter
Join Date: Oct 2009
Posts: 204
Ritchie,
Don't know if you got your molding. Take a look at this auction on ebay. For the price he's asking, this is a steal. http://cgi.ebay.ca/ws/eBayISAPI.dll?...E:B:SS:CA:1123
Don't know if you got your molding. Take a look at this auction on ebay. For the price he's asking, this is a steal. http://cgi.ebay.ca/ws/eBayISAPI.dll?...E:B:SS:CA:1123
Also ordered several new clips to help secure the molding back to its original state through Fusicks so Thanks to al who helped me with my search.
Richey
November 27th, 2009, 08:28 AM
#26
Registered User
Thread Starter
Join Date: Oct 2009
Posts: 204
Cutlass S wheel hubs
Hi there richeb,
I just joined the site recently as well. Great bunch of people here who are willing to help.
I have a 70 Cutlass S myself. It seems that this rust around the window moldings is very common. I got some of the same on mine.
I found some center wheel caps, which don't fit my car. Don't know if they will work for you, but they are availabe.
Tony
I just joined the site recently as well. Great bunch of people here who are willing to help.
I have a 70 Cutlass S myself. It seems that this rust around the window moldings is very common. I got some of the same on mine.
I found some center wheel caps, which don't fit my car. Don't know if they will work for you, but they are availabe.
Tony
Richey
November 27th, 2009, 08:47 AM
#27
Registered User
Thread Starter
Join Date: Oct 2009
Posts: 204
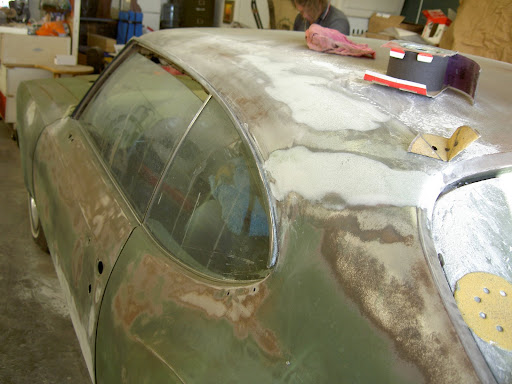
Windshield rust
Hi there richeb,
I just joined the site recently as well. Great bunch of people here who are willing to help.
I have a 70 Cutlass S myself. It seems that this rust around the window moldings is very common. I got some of the same on mine.
I found some center wheel caps, which don't fit my car. Don't know if they will work for you, but they are availabe.
Tony
I just joined the site recently as well. Great bunch of people here who are willing to help.
I have a 70 Cutlass S myself. It seems that this rust around the window moldings is very common. I got some of the same on mine.
I found some center wheel caps, which don't fit my car. Don't know if they will work for you, but they are availabe.
Tony
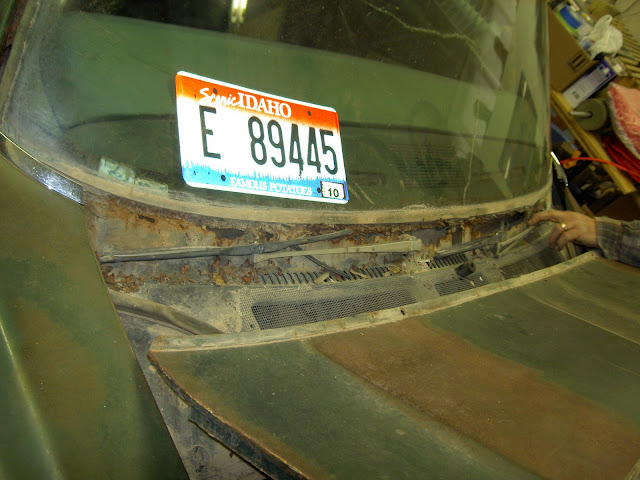
You can see the rust along the windshield wiper post. pretty good 1 inch gap of missing metal at spots...
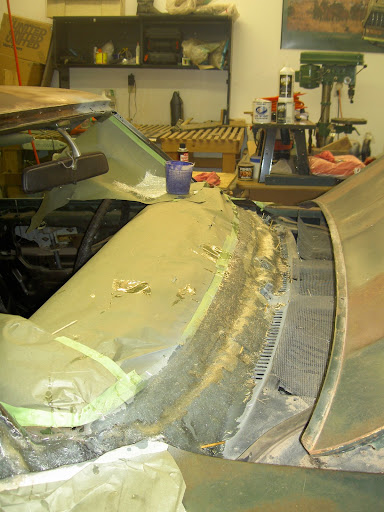
Added some fiberglass to give it a little strength and stability to the wipers? The support for the windshield itself seems pretty strong..and all the fiberglass will be under the large moldng strip....
Richey
November 27th, 2009, 03:29 PM
#28
Registered User

Join Date: Sep 2009
Location: KY
Posts: 1,489
Yeah I have rust in the same place on my 70. I did see on The Parts Place they have a replacement upper dash panel. I hoping that will fix it.
http://www.thepartsplaceinc.com
http://www.thepartsplaceinc.com
November 28th, 2009, 04:33 AM
#29
Registered User

Join Date: Feb 2008
Posts: 666
Yeah I have rust in the same place on my 70. I did see on The Parts Place they have a replacement upper dash panel. I hoping that will fix it.
http://www.thepartsplaceinc.com
http://www.thepartsplaceinc.com
Before you order this piece, call or email parts place and ask if this piece is actually for a CUTLASS! I think you will find out it is for a 68-70 EL CAMINO! It cost me $120. to find this out and I'd like to prevent other people from finding out the hard way!
November 29th, 2009, 07:15 PM
#32
Registered User
Thread Starter
Join Date: Oct 2009
Posts: 204
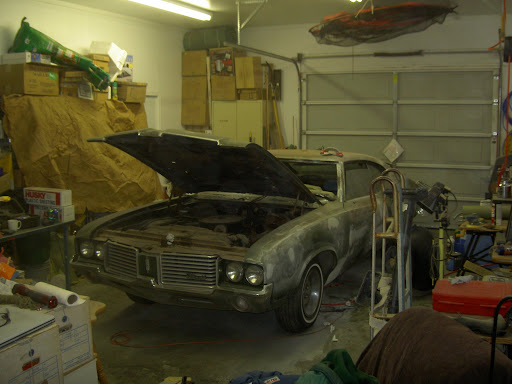
On going restoration
Thanks for the part number but timing has forced us to improvise we're on a three weekend blitz to finish the body and paint and after weekend #2 we're tired but on schedule with body work complete and several coats of undercoat applied before supper tonight!!!!
Had to go with the fiberglass fix on the dash panel and finshed it off with a rubber under body spray to waterproof the area from further rust....
here's a day by day progress of pics.....
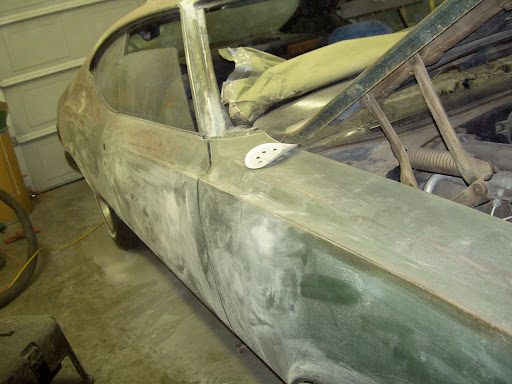
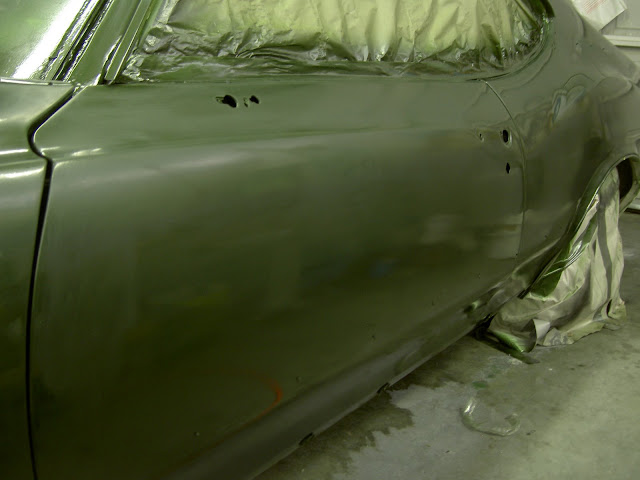
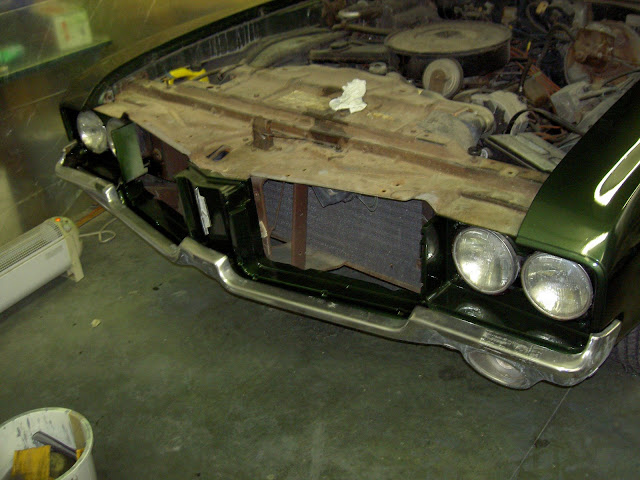
Day 1 removing the molding...
and discovering the rust spots,
Fabricated a couple patches

Finished Day 2
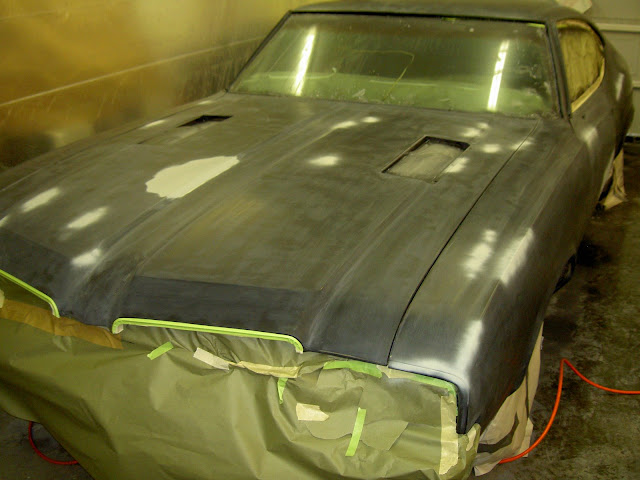
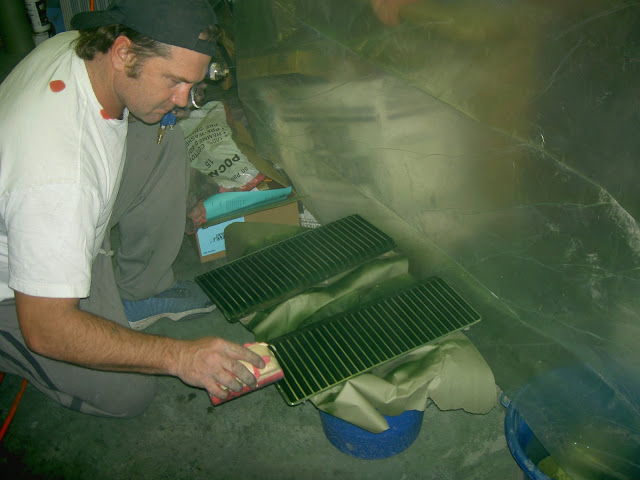
Day Three--Sanding, Sanding, Sanding
and more sanding
Start of day 4
more sanding
Masking finished
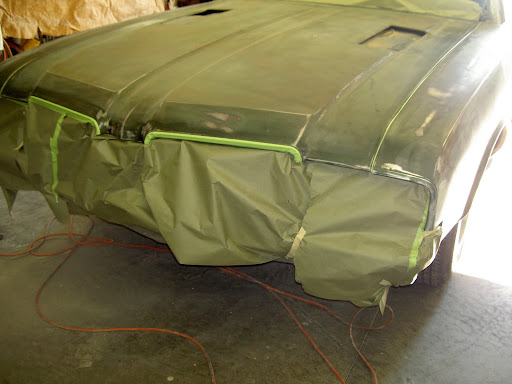
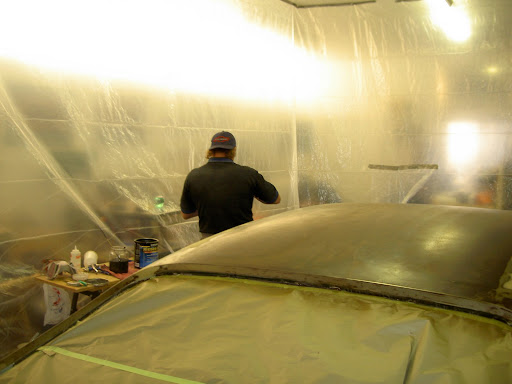
Built paint booth
Uppercoat finished!! End of Day 4!!!!!!!!
More sanding and then finally Paint!!!!! next weekend
Thanks for the interest
Richey
Had to go with the fiberglass fix on the dash panel and finshed it off with a rubber under body spray to waterproof the area from further rust....
here's a day by day progress of pics.....
Day 1 removing the molding...
and discovering the rust spots,
Fabricated a couple patches
Finished Day 2
Day Three--Sanding, Sanding, Sanding
and more sanding
Start of day 4
more sanding
Masking finished
Built paint booth
Uppercoat finished!!
End of Day 4!!!!!!!!More sanding and then finally Paint!!!!! next weekend
Thanks for the interest
Richey
Last edited by richeyb; November 30th, 2009 at 05:15 PM.
November 30th, 2009, 05:07 PM
#34
Registered User
Thread Starter
Join Date: Oct 2009
Posts: 204
Vinyl Top Help
Thanks for the comment Dan, I'm now planning ahead after the final paint dries for my next step. I'm wanting to go back to the original vinyl top... looking around our area I just can't find someone local that does that for a reasonable price and in a timely manner...
How hard is it to accomplish for a first timer? several web sites show how to get it smooth but can't seem to find one that shows how to finish the project--the edges... or triming down a universal top
I found a very reasonable order site, not sure of quality tomcotops.com. Right now my windshield is out as part of my restoration project and I had planned to leave it out until the vinyl was put on to help with installation. (not sure this is necessary??)
Anyone have any thoughts and tips on installing a vinyle tops??
Richey
PS Understand most restorations don't go with the vinyl top....
Last edited by richeyb; November 30th, 2009 at 05:16 PM.
December 8th, 2009, 05:51 PM
#35
Registered User
Thread Starter
Join Date: Oct 2009
Posts: 204
Day 5,6 & 7 of restoration
Trying to finish exterior restoration and paint by day 6 runs over due to dust....
Day 5 starts with sanding and masking

Touch up with primer
Sanded it all dwonwith 500 and 1200

Final wash with solvent and air
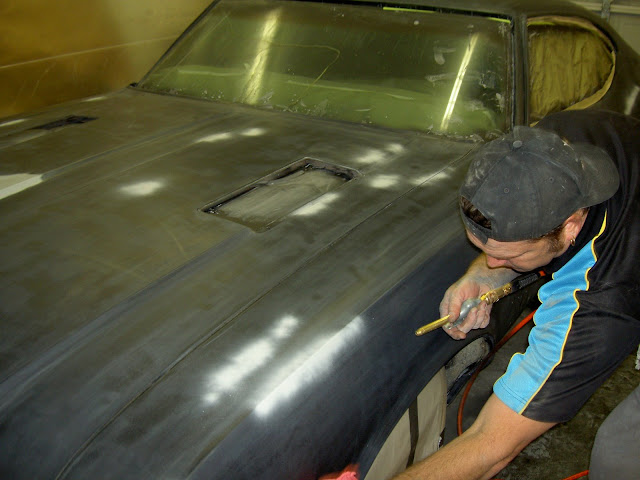
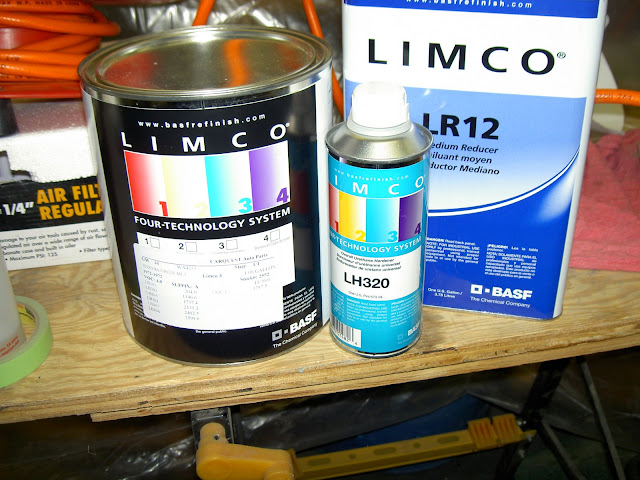
Paint 8-4-1
Day 5 starts with sanding and masking
Touch up with primer
Sanded it all dwonwith 500 and 1200
Final wash with solvent and air
Paint 8-4-1
December 8th, 2009, 06:37 PM
#37
Registered User
Thread Starter
Join Date: Oct 2009
Posts: 204
Day 5,6 & 7 of restoration
The Aussie's (master painter) goal is to finish exterior restoration and paint by day 6 runs but ran over one day due to dust and temperature in the booth....
Day 5 starts with sanding and masking
Sanded it all down with 500 and 1200
Final wash with Max Solve and air
Paint 8-4-1
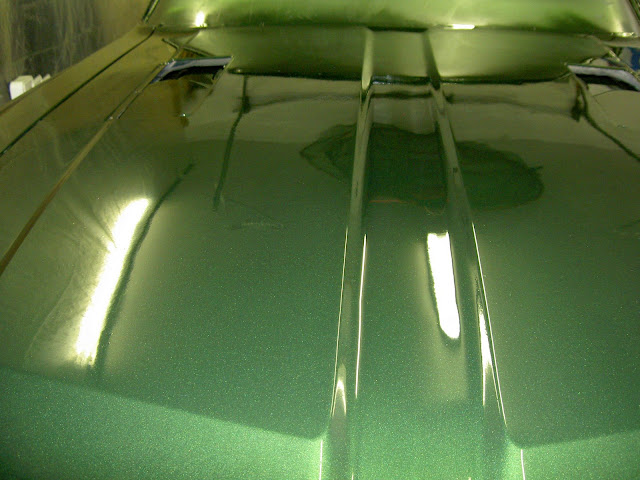
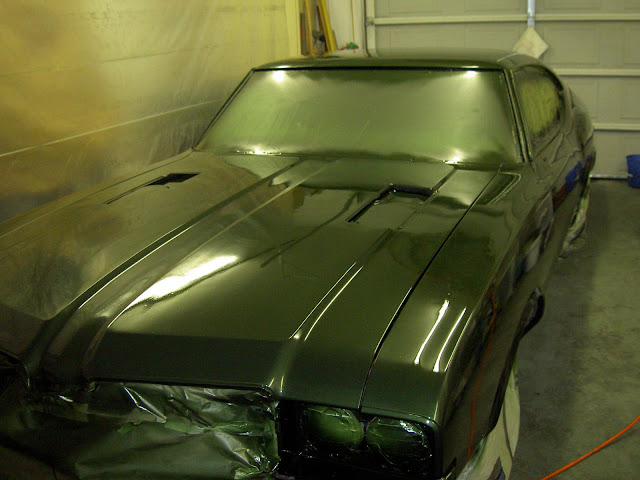
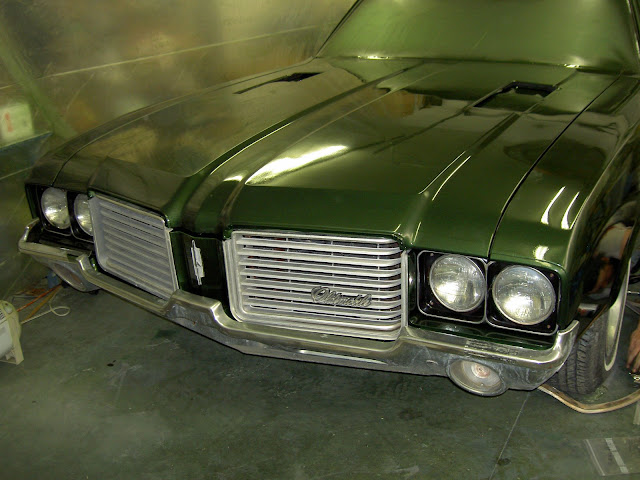
Back to original Sequoia Green!
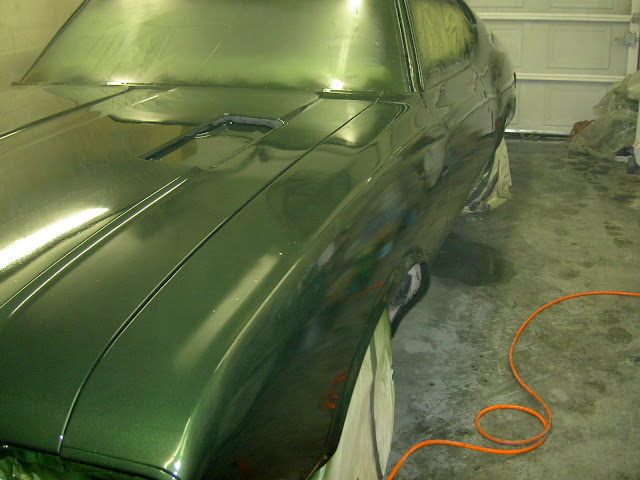
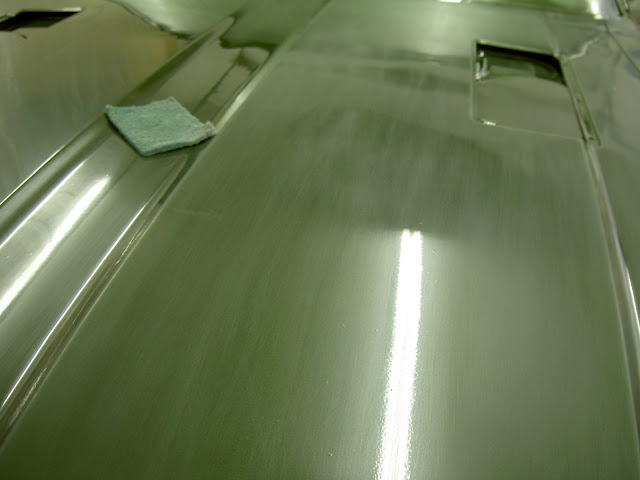
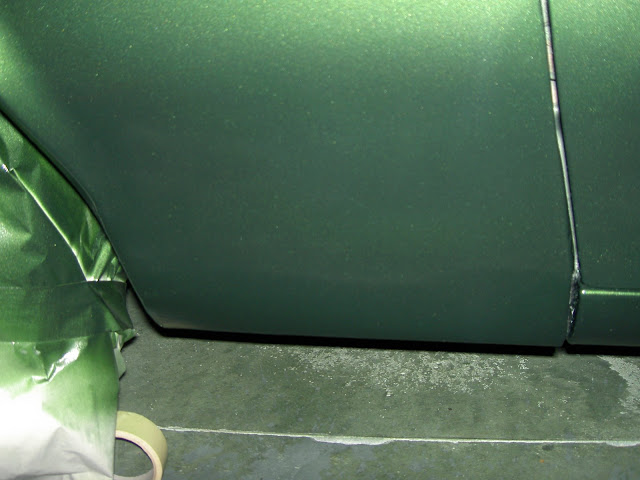
After three coats looking good-except for a couple problem areas due to temperature and dust on the boot
Day 6 scouring and preping for final coats
Ready for final coats
Final 3 coats
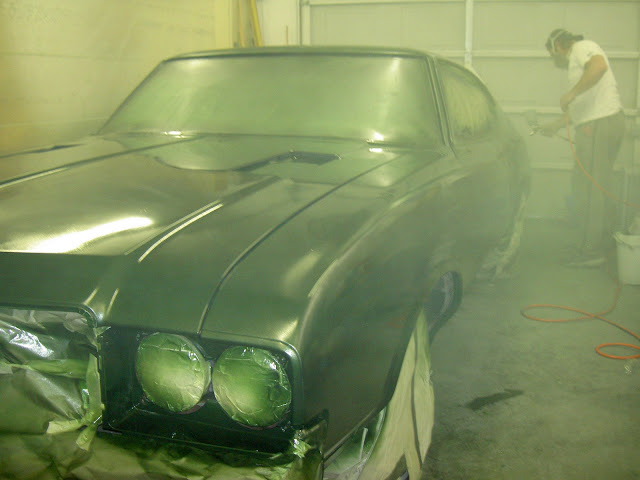
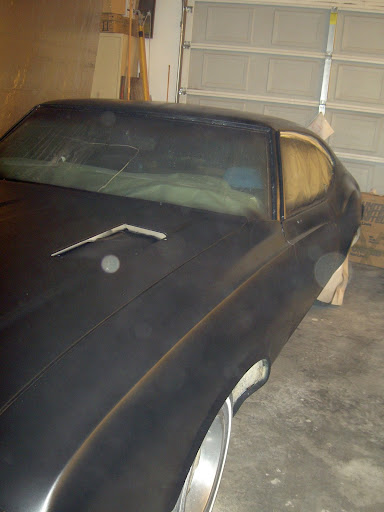
Finished with 6 glossy coats with a deep shine!!
Repairs and fabrications look new!
Ended day 6 feathering the edges
Start of day SEVEN
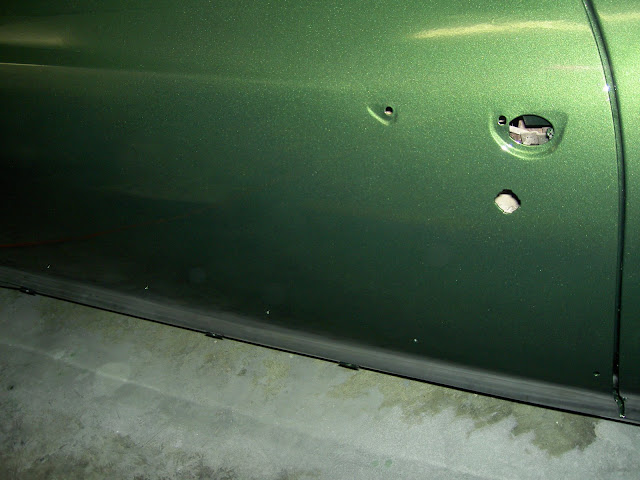
Putting it back together
Adding the molding
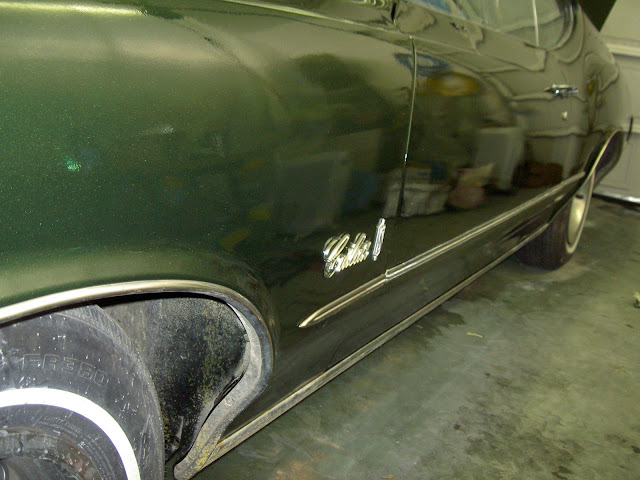
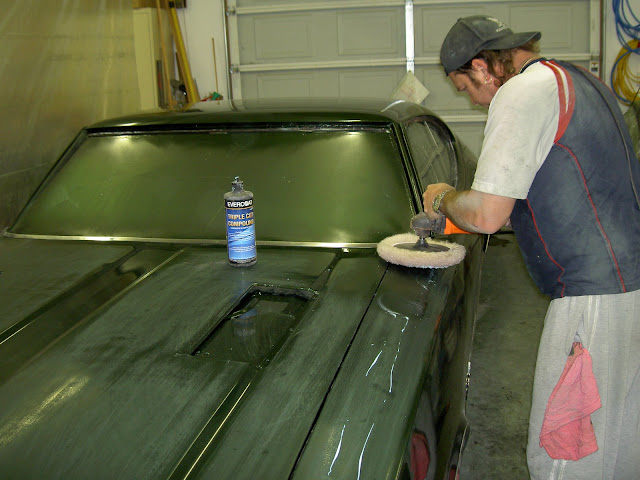
Polishing out the dust!
looking great at the end of day 7!!
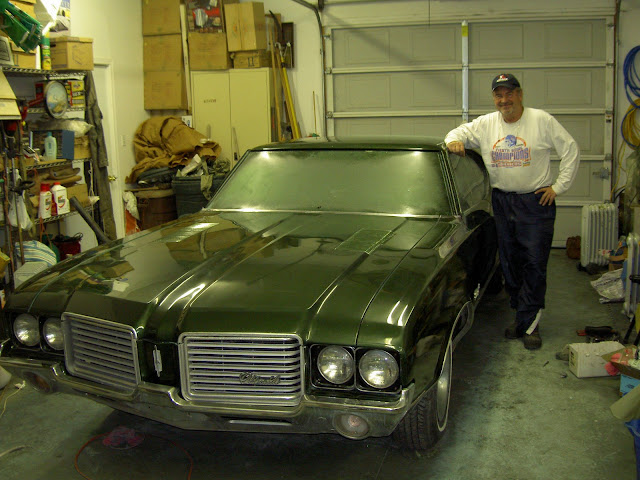
I got a chance of a life time to help with a 7 day miracle as my old rust bucket turned into a beauty!!!
Next comes the roof, windshield and then the interior!! More to come this winter!! Hope to be rolling down the road by Spring!!
Day 5 starts with sanding and masking
Sanded it all down with 500 and 1200
Final wash with Max Solve and air
Paint 8-4-1
Back to original Sequoia Green!
After three coats looking good-except for a couple problem areas due to temperature and dust on the boot
Day 6 scouring and preping for final coats
Ready for final coats
Final 3 coats
Finished with 6 glossy coats with a deep shine!!
Repairs and fabrications look new!
Ended day 6 feathering the edges
Start of day SEVEN
Putting it back together
Adding the molding
Polishing out the dust!
looking great at the end of day 7!!
I got a chance of a life time to help with a 7 day miracle as my old rust bucket turned into a beauty!!!
Next comes the roof, windshield and then the interior!! More to come this winter!! Hope to be rolling down the road by Spring!!
December 9th, 2009, 08:19 AM
#39
Just an Olds Guy
Join Date: Jul 2008
Location: Edmonton, AB. And "I am Can 'eh' jun - eh"
Posts: 24,525
Way to go Richeyb!
Looking really good. I just noticed - you've got cruise on that car. Nice option. Other thing I wanted to know is about the hood louvers. You've done them right matching the color of the car. That's how it was done in 72 on these cars. What is the process you used? Paint and light sanding for the highlights after?
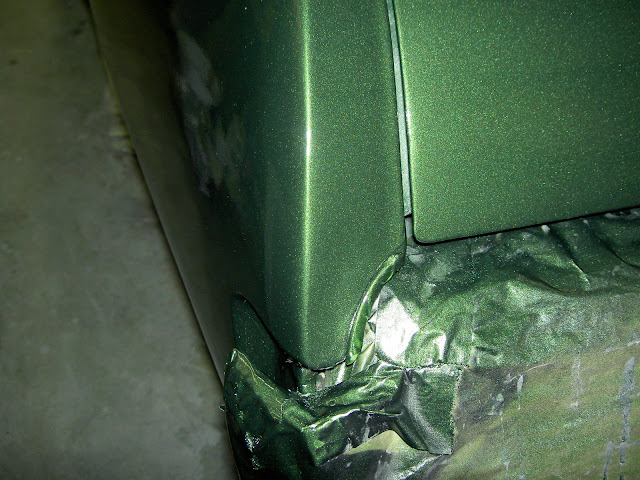
My car also got the "deluxe" treatment with 3 coats of clear coat over top. I was looking at the picture of the trunk area. You've got the quarter panel trim piece taped off. I assume you're putting the trunk stainless back on. When I started dry fitting mine I found that the "extra layers" of paint and clear make the deck lid "too thick" to accept the molding as is. I'm debating whether to expand the trim or lightly sand down the edge of the deck and polish it again before the molding goes back on. Can you check with your friend and find out the best thing to do. If you've already put your trim back on, I'd love to hear back from you on this.
You really have a gorgeous car, and I love the color. That is going to really pop in the bright sunshine. Only thing I don't like about dark colors is trying to keep them clean.
As you've probably already found out, these cars are absolutely wonderful to drive. You'll have plenty to do over the winter doing the detail work inside and under the hood. Great photo story also btw.
Looking really good. I just noticed - you've got cruise on that car. Nice option. Other thing I wanted to know is about the hood louvers. You've done them right matching the color of the car. That's how it was done in 72 on these cars. What is the process you used? Paint and light sanding for the highlights after?
My car also got the "deluxe" treatment with 3 coats of clear coat over top. I was looking at the picture of the trunk area. You've got the quarter panel trim piece taped off. I assume you're putting the trunk stainless back on. When I started dry fitting mine I found that the "extra layers" of paint and clear make the deck lid "too thick" to accept the molding as is. I'm debating whether to expand the trim or lightly sand down the edge of the deck and polish it again before the molding goes back on. Can you check with your friend and find out the best thing to do. If you've already put your trim back on, I'd love to hear back from you on this.
You really have a gorgeous car, and I love the color. That is going to really pop in the bright sunshine. Only thing I don't like about dark colors is trying to keep them clean.
As you've probably already found out, these cars are absolutely wonderful to drive. You'll have plenty to do over the winter doing the detail work inside and under the hood. Great photo story also btw.
December 9th, 2009, 10:01 AM
#40
Registered User
Join Date: May 2008
Location: Toronto,Ontario
Posts: 467
You and your helpers are doing an excellent job it's really looking nice.
Sure would like to see a picture of her sitting outside with the sun shining on her.Bet you'll need sun glasses when you do that.
Sure would like to see a picture of her sitting outside with the sun shining on her.Bet you'll need sun glasses when you do that.


